From Unity Code to App
From development to release with Gitlab CI and Fastlane

It has probably happened to you before. You want to publish your app and preferably to the App Store and Play Store at the same time. Most of the time this means a lot of work. I have spent a lot of time myself on this problem and now I'm ready to share my solution with you.
Why CI?
Long story short you want to push and have the app in the app stores a few minutes later. And it saves a lot of pain and time (at least after the CI is working).
Okay so what topics should a good CI process cover? As i am not a fan of walls of text, I will give you a brief overview over the requirements of the different topics.
Build
There comes a time when your app is stable and you want to show it to your friends or kind strangers. At this point it is always advisable to have a working version ready to share. And ideally your non-techy friend can also download and install it without doing the wiring.
Test
Before each release, every unit test is executed, ensuring that the biggest errors are caught. This will help you not to lose your players due to an incorrectly built app or serious bugs. And you can develop with more confidence knowing that before each build all previously developed features (which have unit tests) have been tested and still work.
Let's get started!
I will tell you how I did it. It may not be the best or the fastest way, but it's a way that works and is a battle proven, good solution for me.
Prerequisits
- Unity (might be needed for development :P)
- Gitlab
- Gitlab Runner on MacOS (Mac mini or similar as gitlab runner)
- Fastlane
- Unity Build Docker Container
- CI Build Tools
- Google Developer Account
- Apple Developer Account
- Coffee - ☕ A lot of coffee☕☕☕☕
Mac Runner Setup
The Mac must be registered in Gitlab and should have the tag macos.

I use a shell executor on the Mac, there are other solutions, but they were not an option for me, because my server does not have enough power for e. g. virtualization.
On MacOS we first install HomeBrew, if it is not already installed.
/bin/bash -c "$(curl -fsSL https://raw.githubusercontent.com/Homebrew/install/HEAD/install.sh)"
Now install fastlane ...
brew install fastlane
... and if not already done install and register the gitlab runner.
brew install gitlab-runner
brew services start gitlab-runner
gitlab-runner register

Building the app(s)
It's time for some code!
The base template is there to avoid having to rewrite everything in every project. It also makes the gitlab-ci.yml in the project way cleaner.
Base Template
Gitlab CI splits the pipeline in different stages. This makes it easier to understand the pipeline and run parts concurrently.
I prefer the following stages, to keep things clean and separated:
stages:
  - activation
  - test
  - build
  - predeploy
  - deploy
We cache the Library folder generated by Unity. That can save a lot of time. In some of my projects, even over an hour.
cache:
    key: "$CI_PROJECT_NAMESPACE-$CI_PROJECT_NAME-$CI_COMMIT_REF_SLUG-$TEST_PLATFORM"
    paths:
      - Library/
Now we load our build tools into the project folder and activate the license (may differ for a Unity Pro license). You could also check it directly into the repository, but I prefer the relative small overhead of downloading them each time to make it easier to update and not having to worry about CI in the project build.
.unity_before_script: &unity_before_script
  before_script:
    - apt-get update -y && apt-get upgrade -y && apt-get install -y curl unzip
    - curl [URL to the BuildTools] -L --output UnityBuildFiles.zip && unzip UnityBuildFiles.zip
    - chmod +x ./ci/before_script.sh && ./ci/before_script.sh
    - chmod +x /root/.local/share/unity3d/Unity/Unity_lic.ulf
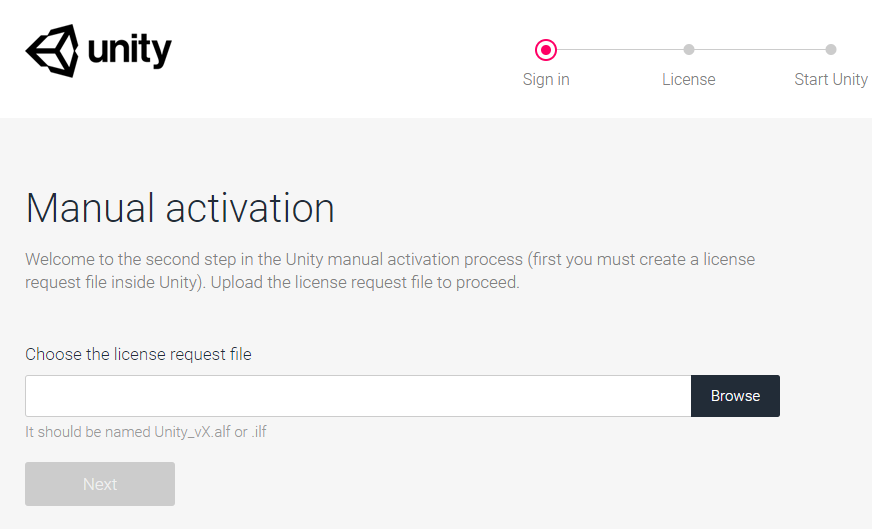
If we have not yet specified a license in the UNITY_LICENSE_CONTENT (environment) variable, we create an alf file which we convert to a license file in Unity.
For more information, please visist: license.unity3d.com/manual
We also need to fill the (environment) variables UNITY_USERNAME and UNITY_PASSWORD with our login data for a Unity account. These will be used to login to the authentication server. This way a valid alf file can be created.
Make sure to check Masked to prevent your secret data to be leaked to the job output.

get-activation-file:
  rules:
    - if: $UNITY_LICENSE_CONTENT == null
  stage: activation
  script:
    - apt-get update -y && apt-get upgrade -y && apt-get install -y curl unzip
    - curl [URL to the BuildTools] -L --output UnityBuildFiles.zip && unzip UnityBuildFiles.zip
    - chmod +x ./ci/get_activation_file.sh && ./ci/get_activation_file.sh
  artifacts:
    paths:
      - ./unity3d.alf
    expire_in: 10 min # Expiring this as artifacts may contain sensitive data and should not be kept public
Now the main part is building and testing. We will extend the .build each time, but more about that later.
We run all unit tests on every build of the master/develop branch and stop the pipeline as soon as one fails or compile errors are encountered (editor scripts are my personal favorites 😊).
This has the advantage that we don't waste computing time on builds that wouldn't compile anyway.
.build:
  stage: build
  extends: .unity_before_script
  rules:
    - if: $CI_COMMIT_REF_NAME == "master"
    - if: $CI_COMMIT_REF_NAME == "develop"
  script:
    - chmod +x ./ci/build.sh && ./ci/build.sh
  artifacts:
    paths:
      - ./Builds/
  tags:
    - unity

.test:
  stage: test
  extends: .unity_before_script
  rules:
    - if: $CI_COMMIT_MESSAGE =~ /\[skip[ _-]tests?\]/i
      when: never
    - if: $SKIP_TEST
      when: never
    - if: $CI_COMMIT_REF_NAME == "master"
    - if: $CI_COMMIT_REF_NAME == "develop"

  script:
    - chmod +x ./ci/test.sh && ./ci/test.sh
  artifacts:
    paths:
      - $(pwd)/$TEST_PLATFORM-results.xml
  tags:
    - unity

test-playmode:
  extends: .test
  variables:
    TEST_PLATFORM: playmode

test-editmode:
  extends: .test
  variables:
    TEST_PLATFORM: editmode
Integrate in your project
Let's get to the part we need to change in every project.
At the beginning of each yaml we provide the Docker image with the correct Unity-Version so that the tests can be executed.
image: unityci/editor:2020.3.11f1-android-0
Now we include the base template as mentioned before:
include:
  - project: [git Reposotry zu den Templates]
    file: [unity template Filename]
    rev: master
Android
Now we build the Android apk. Fortunately Unity is able to generate a signed version here. (*Looking at you Apple*) This makes a lot of things easier.
The environment variable CI_PIPELINE_ID is set by Gitlab and we use it for the apk-upload to the Play Store and to get a unique version number.
build-android:
  extends: .build
  image: unityci/editor:2020.3.11f1-android-0
  variables:
    BUILD_TARGET: Android
    BUNDLE_VERSION_CODE: $CI_PIPELINE_IID
    BUILD_APP_BUNDLE: "false"
Apple
Let's move on to Apple. The first part of this is relatively painless, but you will notice that it produces relatively large artifacts. This is because we have a complete xcode build as an artifact.
Since we must be running this on the Mac in the next step, there is no way around it. I prefer to build the Unity build on a Docker Linux server as I can scale it much easier and in my case it is more powerful than the Mac.
build-xcode-project:
  extends: .build
  image: unityci/editor:2020.3.11f1-ios-0
  variables:
    BUILD_TARGET: iOS
By using the macos runner tag (as mentioned above) GitLab knows that we can only build on the Mac. It makes things so much easier when using a Mac. There are other ways (iOS Builder) but in this blog post I will focus on the Mac version.
You can also set up a bunch of different runners using the tag to have a pool of runners.
At the end of this step you will get a signed ipa file, which we can use for further steps.
build-ipa:
  stage: predeploy
  script:
  - fastlane ios build
  artifacts:
    paths:
    - $CI_PROJECT_DIR/dist/app.ipa
  variables:
    PROJECT_PATH: $CI_PROJECT_DIR/Builds/iOS/[appname]/Unity-iPhone.xcodeproj
    LANG: "en_US.UTF-8"
    LC_ALL: "en_US.UTF-8"
  needs:
    - build-xcode-project
  tags:
    - macos
Fastlane Files
All Fastlane files have to be inside your ./fastlane directory.
Appfile
The Appfile stores useful information that are used across all fastlane tools like your Apple ID or the application Bundle Identifier, to deploy your lanes faster and tailored on your project needs.
app_identifier("") # The bundle identifier of your app
apple_id("") # Your Apple email address

itc_team_id("") # App Store Connect Team ID
team_id("") # Developer Portal Team IDFastfile
default_platform(:ios)

platform :ios do
  desc "Build IPA file"
  lane :build do

	match(
		type: "adhoc",
		git_url: [URL to an certificates Repository]
	)

	update_code_signing_settings(
		use_automatic_signing: true,
		path: ENV["PROJECT_PATH"],
		team_id: CredentialsManager::AppfileConfig.try_fetch_value(:team_id)
	)


	build_app(
	  project: ENV["PROJECT_PATH"],
	  include_symbols: false,
	  include_bitcode: false,
	  export_method: "ad-hoc",
	  output_directory: "./dist/",
	  output_name: "app.ipa",
		xcargs: "-allowProvisioningUpdates"
	)
  end
endFirst we run the match to make sure that the required certificates from Apple are present on the runner.
Now that we have everything we need, we set the project to automatic signing. We load the team_id from the AppFile we created before. Now xcode can sign the ipa automatically.
Now we come to the final step we have all been waiting for, we build the .ipa file. Here I intentionally use a generic name like "app.ipa" to make it easier to convert it to an artifact later.

Now you can install the ipa on the deposited devices via download from a website with the appropriate manifest.plist. I'll just give you an example from my file.
<?xml version="1.0"	encoding="UTF-8"?>
<!DOCTYPE plist	PUBLIC "-//Apple//DTD PLIST 1.0//EN" "http://www.apple.com/DTDs/PropertyList-1.0.dtd">
<plist	version="1.0">
   <dict>
      <key>items</key>
      <array>
         <dict>
            <key>assets</key>
            <array>
               <dict>
                  <key>kind</key>
                  <string>software-package</string>
                  <key>url</key>
                  <string>[PATH to the Ipa download Link]</string>
               </dict>
            </array>
            <key>metadata</key>
            <dict>
               <key>bundle-identifier</key>
               <string>[bundle name]</string>
               <key>bundle-version</key>
               <string>1.0</string>
               <key>kind</key>
               <string>software</string>
               <key>title</key>
               <string>[app name]</string>
            </dict>
         </dict>
      </array>
   </dict>
</plist>
Now add a download button with the appropriate href and you can install it on any device defined in the Apple account.
<a id="downloadButton" target="_blank" href="itms-services://?action=download-manifest&url=[Link zur plist]"/>I hope this post has been helpful to you. Of course, there is still a lot to know and mybe a lot to improve, but that should be enough for my first post. Maybe another important step would be publishing on the App Store and the Play Store, but maybe another time.